
The explorer’s companion
The field journal.
Choose a chapter, then open just the location you need. Start with a nudge; reveal the solution only when you’re ready.
A little mystery at the door
Decode the journal.
Arrange five symbols to break the journal’s seal.
Your key: The forgotten sequence
Hints are available inside the puzzle. Solve it once and this section stays unlocked in this browser when storage is available.
Explore all three puzzles ↗Choose a chapter
Select from 9 available chapter guides.
These guides cover all nine chapters, including the finale and epilogue. Later chapters reveal story locations; open only the hints and scene states you want to see. The planned first public development release remains Chapters 1–4.
Chapter 1 / Field journal
Portal Valley
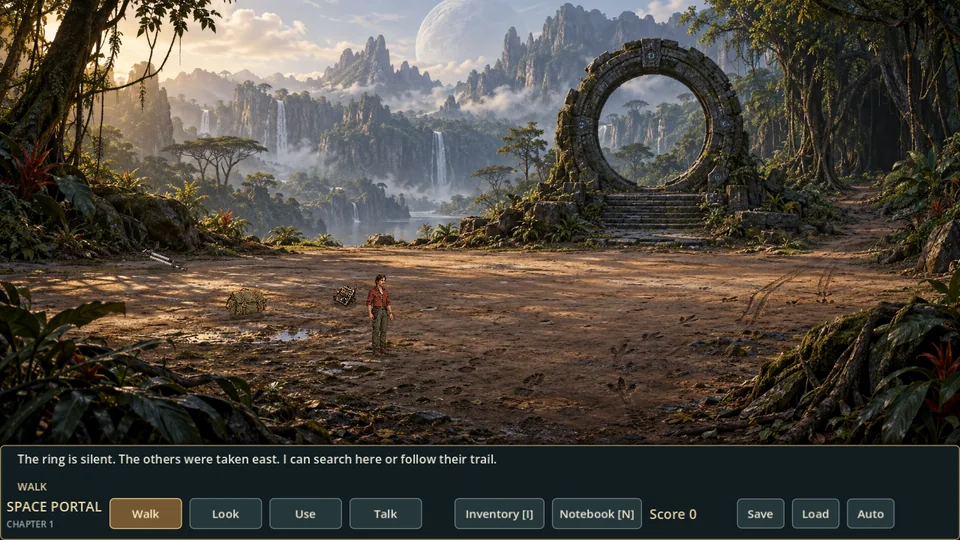
Chapter route advice · spoilers
Follow the expedition trail. You can return to earlier locations before committing to the descent.
01Collapsed TerraceLocation
01 / A gentle nudge
The slab is too heavy to lift directly.
02 / Reveal a clearer clue
A lever needs a solid point to pivot on. Examine the tripod and loose stone.
03 / Reveal the solution · spoilers
Take the tripod beside Mike’s hand. Look at the loose stone to plan the fulcrum, use the tripod on the lintel, free his boot, then climb to Portal Clearing.
02Portal ClearingIllustrated field note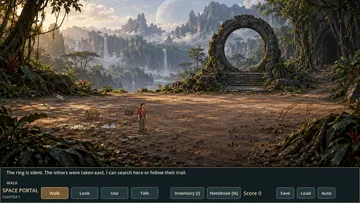
01 / A gentle nudge
The attack scattered our equipment. I should inspect the pack and anything beside it.
02 / Reveal a clearer clue
The radio is beside the field pack. The tripod I used at the terrace is already with me. The tracks across the ground matter too.
03 / Reveal the solution · spoilers
Search the field pack and take the radio. Look at the trail. You can follow it east now and return to search again later.
03Whispering GroveLocation
01 / A gentle nudge
Watch the moth as it approaches the vine. The plant's reaction is brief but consistent.
02 / Reveal a clearer clue
There may be a way to reproduce that sound. Examine the materials lying on the grove floor.
03 / Reveal the solution · spoilers
Take the hollow reed and insect husk. Combine them into the Buzzing Whistle, then use it on the vine.
04Luminous MarshLocation
01 / A gentle nudge
The path east stays open, but the pungent fruit might be useful later.
02 / Reveal a clearer clue
The fruit's sap irritates bare skin. Look through the gear recovered in Portal Clearing for a container.
03 / Reveal the solution · spoilers
Use the Empty Ration Pouch on the Reekfruit plant.
05Hunter's HollowIllustrated field note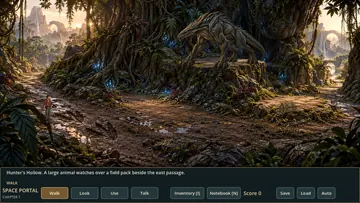
01 / A gentle nudge
Observe the Hunter and the open ground below its ledge. A direct approach to the pack is risky.
02 / Reveal a clearer clue
The Hunter follows strong scents. Reekfruit is in Luminous Marsh if you have not collected it yet.
03 / Reveal the solution · spoilers
Use Pouched Reekfruit on the open ground below the ledge. Let the Hunter jump down and start eating, then follow the lower foreground trail around it to the field pack. Getting too close is fatal. Search the recovered pack for the survey cable, climbing clip, binoculars and toolkit, then continue east to the gorge.
06Broken GorgeIllustrated field note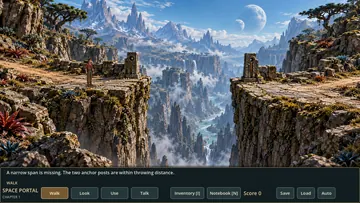
01 / A gentle nudge
The old bridge has a solid support on the far side, but the gap is too wide to jump.
02 / Reveal a clearer clue
The tripod head can be removed with the toolkit. A clip and survey cable can turn it into a grapple; test its reach.
03 / Reveal the solution · spoilers
Combine toolkit with tripod, head with clip, grapple with cable. Throw at the far support. Extend the short line with the nylon strap, throw again, then use the line to test and secure it.
07Ancient RelayLocation
01 / A gentle nudge
Start with what Mike can actually see and understand. The whole machine does not need to make sense at once.
02 / Reveal a clearer clue
Light the work area and inspect the panel. Familiar expedition gear can supply small repair parts.
03 / Reveal the solution · spoilers
Use the flashlight and toolkit on the hatch. Combine radio with toolkit, then wire with knife. Fit the stripped wire and retaining clip to the contacts. Compare Eleanor's notebook with the powered map.
08Black-Glass RidgeLocation
01 / A gentle nudge
The convoy is too distant to identify by eye.
02 / Reveal a clearer clue
The Hunter's recovered field pack contained binoculars.
03 / Reveal the solution · spoilers
Use the binoculars on the distant military road. Identify Earth at the powered relay first, then finish the chapter or keep exploring.
Chapter 2 / Field journal
The Long Way Around

Chapter route advice · spoilers
Gather the lower-forest supplies before the first ascent. The swarm and collector branches can be solved in either order.
01Black-Glass DescentLocation
01 / A gentle nudge
Observe before stepping onto a watched road.
02 / Reveal a clearer clue
Your binoculars can separate civilians from guards. The forest path leaves to the east.
03 / Reveal the solution · spoilers
Use binoculars on the checkpoint; follow the east path into the Resonant Forest.
02Resonant ForestIllustrated field note
01 / A gentle nudge
The broad fungus loses pressure through its torn seam.
02 / Reveal a clearer clue
Search the lower paths for something flexible and sticky.
03 / Reveal the solution · spoilers
Collect resin in the Root Labyrinth using the empty pouch. Use Root Resin on the fungus, then Use / Take the fungus to launch.
03Root LabyrinthLocation
01 / A gentle nudge
The golden sap stays flexible when it sets.
02 / Reveal a clearer clue
You need a container that will not leak.
03 / Reveal the solution · spoilers
Use the empty ration pouch on the resin. Three portions are allocated; patching the fungus uses only one.
04Mineral SeepLocation
01 / A gentle nudge
The dry bank holds several useful materials.
02 / Reveal a clearer clue
The loose crystal is portable. The shell is empty, and the seep can refill your canteen.
03 / Reveal the solution · spoilers
Take the loose crystal, use the knife on the shed shell, and use the canteen on the water. Combine the plate with the knife to cut an insulating washer.
05Shimmer MeadowLocation
01 / A gentle nudge
Notice what the insects do when a patrol passes.
02 / Reveal a clearer clue
An electrical field may draw them away. The radio has an accessible coil; the crystal reacts to electricity.
03 / Reveal the solution · spoilers
In Inventory, Examine the radio and open its coil catch. Examine the flashlight and remove its battery. Combine coil + crystal with the battery in your pack. Use the field lure on the boulder. Release the root binding to revisit the lower forest.
06Burrower's HollowLocation
01 / A gentle nudge
The collector values shine, not usefulness.
02 / Reveal a clearer clue
Offer it a moving glint away from the nest. Your cutters remain even without the screwdriver.
03 / Reveal the solution · spoilers
Examine the radio and cut its reflective backing free. Use the knife on the fiber plant. Combine backing + fiber, then use the shiny lure on the low branch. Take the nest contents.
07Invisible BridgeIllustrated field note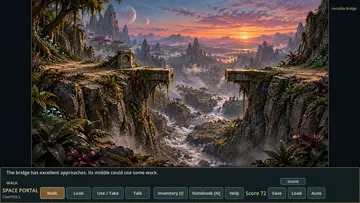
01 / A gentle nudge
The gap needs a continuous surface, not a leap.
02 / Reveal a clearer clue
Inspect the projector. The disc fits, but the collar around its conductor has crumbled.
03 / Reveal the solution · spoilers
Use the conductor disc on the projector, then fit a carapace washer cut with the knife. Use the projector and press Commission bridge. The disc returns to your pack.
08Hanging BasinLocation
01 / A gentle nudge
Watch the people on the lower road.
02 / Reveal a clearer clue
Compare the two sets of carvings and keep track of landmarks.
03 / Reveal the solution · spoilers
Use binoculars on the caravan. Look at the marker, then follow the steps south to Falling Water.
09Falling WaterIllustrated field note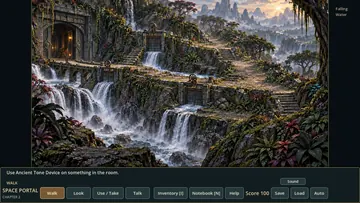
01 / A gentle nudge
A dry entrance is not enough. Something must move the heavy door.
02 / Reveal a clearer clue
The lower conduit drives a piston. Divert some water without starving it.
03 / Reveal the solution · spoilers
Set Upper feed to HALF, Western spillway to OPEN and Lower conduit to OPEN. Leave all three in that balanced configuration.
10Maintenance StationLocation
01 / A gentle nudge
This map must be aligned with the landscape, not with a decorative symbol.
02 / Reveal a clearer clue
Look at the map for a field sketch. The falls are southeast of the station and the split mountain north.
03 / Reveal the solution · spoilers
Use the conductor disc on the console. Rotate the terrain clockwise until the falls lie southeast and the split mountain north; verify the alignment. Inspect the signal and take the three-symbol device.
11Storm RidgeLocation
01 / A gentle nudge
The stranger does not understand your words, but watches what you carry.
02 / Reveal a clearer clue
Something from the Ancient station may be familiar to her.
03 / Reveal the solution · spoilers
While snared, use the Ancient Tone Device on the stranger. Play the three symbols, introduce yourself, and follow her lead through the patrol scene. Prepare supplies before choosing to depart for Talar.
Chapter 3 / Field journal
The People of Talar
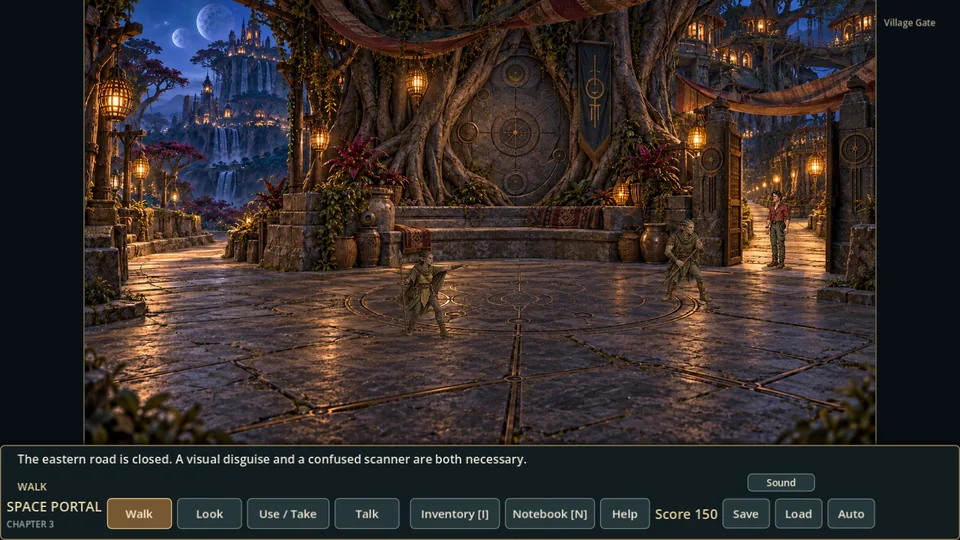
Chapter route advice · spoilers
Engineering, animal care and language are separate threads. Complete the pump and translator before Maera’s full briefing.
01Village GateIllustrated field note
01 / A gentle nudge
Toren needs to understand what happened, not hear louder English.
02 / Reveal a clearer clue
Show Eleanor’s notebook and arrange a simple history of arrival and capture.
03 / Reveal the solution · spoilers
Use the notebook on Toren. Choose Portal → Seven travelers → Soldiers → Six captives → Mike follows. Present the story.
02Central TerraceLocation
01 / A gentle nudge
Several useful routes are open at once.
02 / Reveal a clearer clue
The water works, market/pens and shrine each offer a different thread.
03 / Reveal the solution · spoilers
Engineering: visit Keru via Water Works. Animal care: north from Market. Language: south to Shrine. The elder needs pump repair and a partial translator.
03Water WorksIllustrated field note
01 / A gentle nudge
The upper drive slips under load. The livestock stream is independent.
02 / Reveal a clearer clue
A flexible insert needs reinforcement, and repair will require pressure calibration.
03 / Reveal the solution · spoilers
Earn fiber by repairing Keru’s heater. Combine woven fiber + root resin. Use the coupling on the pump. Test it, set pressure to MEDIUM, then commission.
04Keru's WorkshopLocation
01 / A gentle nudge
Keru has the material you need, but his own heater is broken.
02 / Reveal a clearer clue
Open the heater with tools. A flexible conductor could bridge its fractured contact.
03 / Reveal the solution · spoilers
Use screwdriver or toolkit on the heater. Combine mineral residue + root resin. Use the paste on the heater; Keru provides fiber. One paste portion remains for later.
05MarketLocation
01 / A gentle nudge
Varra wants two objects in exchange for the wafer.
02 / Reveal a clearer clue
The old carved token is valuable, but not enough. Someone else may reward your help.
03 / Reveal the solution · spoilers
Help Oren’s animal. Use the carved trade token or harness clasp on Varra, then confirm the trade with both in your pack. The later Talar pass is never spent.
06Animal PensIllustrated field note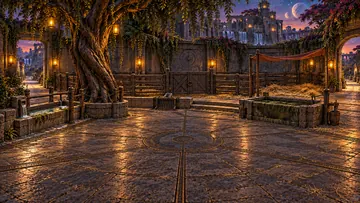
01 / A gentle nudge
Compare the isolated animal with the healthy ones, including their water.
02 / Reveal a clearer clue
Treat the parasites and the dirty trough separately. The clean channel already works.
03 / Reveal the solution · spoilers
Look at healthy animals and the sick Marruk. Borrow Oren’s brush; knife the bark; refill canteen at the clean channel; combine bark + canteen. Use rinse on Marruk with brush. At the sluice: drain, divert rinse, scrub, restore normal flow.
07Elder's HouseLocation
01 / A gentle nudge
Maera can receive you early, but serious questions need trust and language.
02 / Reveal a clearer clue
The pump and the partial translator are separate prerequisites.
03 / Reveal the solution · spoilers
Complete the calibrated pump and translator. Talk to Maera and explicitly begin the briefing. Follow its three pages; supplies arrive and the patrol begins only at its end.
08Shrine of the WalkersLocation
01 / A gentle nudge
The tone device fits the recess. Learning can begin before other village work.
02 / Reveal a clearer clue
Match Sela’s recorded sounds with ordinary objects; good matches remain saved.
03 / Reveal the solution · spoilers
Use the tone device on the console. Na=water, kir=fire, tal=person, esh=star, orr=animal, en=home. All six associations plus the traded wafer permit comparison and a partial translator.
09Lower TerracesLocation
01 / A gentle nudge
A hiding place addresses only half of this inspection.
02 / Reveal a clearer clue
Watch the scanner pass the mineral-water pipe; a disguise must also survive a visual check.
03 / Reveal the solution · spoilers
After Maera’s briefing, Look at scanner. Examine radio to salvage its final signal wire. Combine coil + crystal with wire in pack. Use jammer on pipe. Ask trader for robe, use robe on alcove, then depart east. Sela recovers coil and crystal.
Chapter 4 / Field journal
The Mines of Varrak
Chapter route advice · spoilers
Prepare the cell key and control-room plan in either order. Review the extraction before broadcasting: some return routes then close.
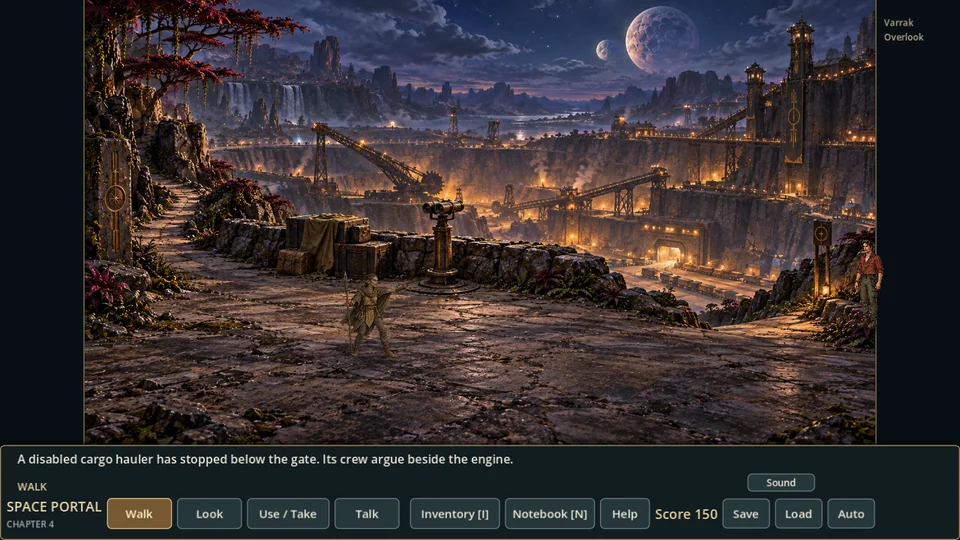
01Varrak OverlookIllustrated field note
01 / A gentle nudge
Study the traffic from cover.
02 / Reveal a clearer clue
Binoculars can distinguish a familiar person among the workers.
03 / Reveal the solution · spoilers
Use binoculars on the mine. Then go east to the disabled cargo vehicle.
02Service RoadLocation
01 / A gentle nudge
The crew cannot restart the hauler.
02 / Reveal a clearer clue
Observe their routine, then inspect the actuator with tools. A complete repair would let it leave without you.
03 / Reveal the solution · spoilers
Observe the crew until they leave. Use toolkit on the truck, select manual cargo reset, then hide in the cargo crate.
03Cargo DepotLocation
01 / A gentle nudge
The guard answers to the machinery.
02 / Reveal a clearer clue
Take the maintenance tag and read the lift warning control.
03 / Reveal the solution · spoilers
Take the tag; use the translator on the alarm, then bridge its test contact with the toolkit.
04Ore Processing FloorLocation
01 / A gentle nudge
Some loads are preserved intact.
02 / Reveal a clearer clue
The tag explains the colored lanes. A fragment can alter what the classifier detects.
03 / Reveal the solution · spoilers
Take the fragment. Use the toolkit on the classifier, fit the fragment, select BLUE and test the route.
05Artifact Recovery RoomLocation
01 / A gentle nudge
The recovery room holds both evidence and useful material.
02 / Reveal a clearer clue
Study the staff-bearing figures and the loose ceramic guard.
03 / Reveal the solution · spoilers
Look at the relief and take the ceramic sleeve. Both matter before leaving.
06Lower Machine GalleryIllustrated field note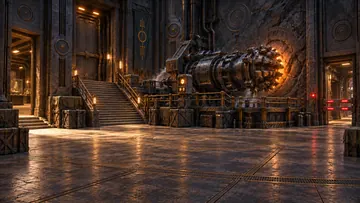
01 / A gentle nudge
A safety shutdown is safer than damage.
02 / Reveal a clearer clue
The thermal sensor can be heated without cutting coolant.
03 / Reveal the solution · spoilers
Take the test leads. Examine the flashlight to remove its battery. Combine sleeve and radio coil, then use the rig on the sensor.
07Prisoner BarracksLocation
01 / A gentle nudge
The reader tests spacing and electrical behavior.
02 / Reveal a clearer clue
Collect the repair offcuts. Thin insulating bands can come from the travel roll.
03 / Reveal the solution · spoilers
Examine the fiber roll to cut bands. Combine them with the shard. Test the key on the lock, then use the remaining conductive paste on the lock.
08Detention Control RoomLocation
01 / A gentle nudge
Preparation and departure are different decisions.
02 / Reveal a clearer clue
Two long tones call a worker shift. Route the worker gate to the excavation; free Ortega before broadcast.
03 / Reveal the solution · spoilers
Set TWO LONG TONES and WORKER GATE, queue the plan. Optionally queue local cells and unlatch the shortcut. Commit only when Ortega is free.
09Excavation ShaftIllustrated field note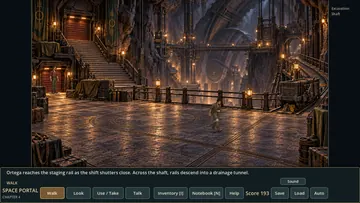
01 / A gentle nudge
The track slopes down. The trolley needs a brake, not an engine.
02 / Reveal a clearer clue
Collect the spare plate, both springs and local retainer from its cradle.
03 / Reveal the solution · spoilers
Combine plate and springs with travel fiber and retainer available. Fit the brake to the trolley, test it, then launch.
10Drainage TunnelLocation
01 / A gentle nudge
Sela promised to meet you outside.
02 / Reveal a clearer clue
The safe ledge is on the right. A familiar signal will carry beyond the bend.
03 / Reveal the solution · spoilers
Use Sela’s signal whistle on the sheltered tunnel mouth, then take the dry east path.
11Abandoned Watch PostLocation
01 / A gentle nudge
Let Ortega rest and talk.
02 / Reveal a clearer clue
His account has several parts. Read each before deciding where to go next.
03 / Reveal the solution · spoilers
Talk to Ortega through all four account pages, then agree on Kethara. The eastern trail reopens the completion summary.
Chapter 5 / Field journal
The City of a Thousand Doors
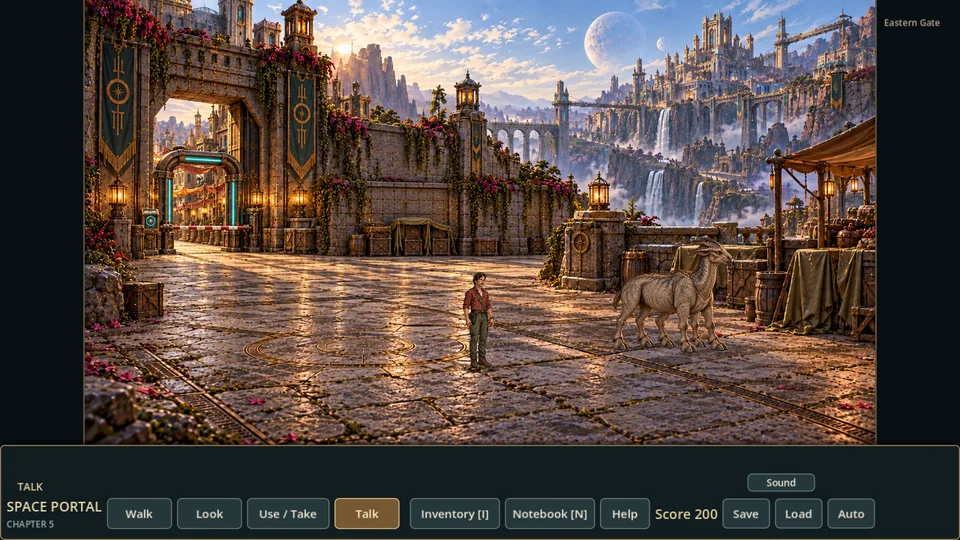
Chapter route advice · spoilers
City access and the records/conduit work have independent branches. The evacuation closes ordinary city returns.
01Eastern GateIllustrated field note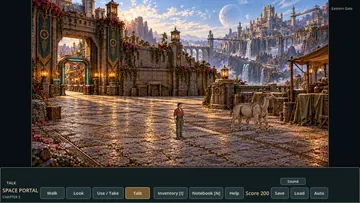
01 / A gentle nudge
A disguise alone will not fool the gate scanner.
02 / Reveal a clearer clue
Observe how livestock tokens differ from passenger checks. The discarded packing seal has useful material.
03 / Reveal the solution · spoilers
Use binoculars on livestock inspection. Take seal scraps; combine Talar pass and cargo wire. Use the shimmed pass on the waiting Marruk and enter under its cargo.
02Lower MarketIllustrated field note
01 / A gentle nudge
The public market connects several independent opportunities.
02 / Reveal a clearer clue
Repair work pays. The crystal musician also affects the surveillance node.
03 / Reveal the solution · spoilers
Visit Narik west for jobs and Jek north for a recorder. Pay the musician once, compare all four notes, and record the fourth. Combine recorder and speaker with city cell/crystal in the pack.
03Narik's Repair ShopLocation
01 / A gentle nudge
Begin with a practical repair. One successful job earns trust.
02 / Reveal a clearer clue
Heater soot, reversed timer gears and a broken toy contact are separate faults. The lift cable has slipped.
03 / Reveal the solution · spoilers
Use tools to open the jobs. Clean the heater, swap middle/final timer gears and test, or use the measured local compound on the toy. After one job, borrow rigging, support the unloaded lift, reseat the cable and test. Buy speaker/cell and collect solvent from Narik.
04Transit PlatformIllustrated field note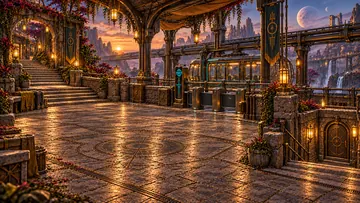
01 / A gentle nudge
The passenger scanner uses a different identity check.
02 / Reveal a clearer clue
Service staff have a separate door beneath this platform.
03 / Reveal the solution · spoilers
Earn Narik’s badge by repairing the lift. Use any public service entrance; passenger boarding stays unavailable.
05Maintenance TunnelsLocation
01 / A gentle nudge
Inside releases connect three public-service doors.
02 / Reveal a clearer clue
The administrative sector needs both a badge and a working emitter. Keep the old ration pouch useful.
03 / Reveal the solution · spoilers
Collect dry dust with the ration pouch. Go east to the relay bay. The south sector gate opens after the surveillance solution.
06Junk MarketLocation
01 / A gentle nudge
Jek can sell the recorder before you borrow a badge.
02 / Reveal a clearer clue
His noisy novelty projector has a stuck contact. Repairing it lowers the recorder price.
03 / Reveal the solution · spoilers
Use toolkit on the novelty device, free its stuck contact, then buy the recorder for 2 credits. Full price is 5; jobs pay 10 total.
07Palace CheckpointLocation
01 / A gentle nudge
The service screen keeps the relay work outside the scan zone.
02 / Reveal a clearer clue
A recorded harmonic needs amplification. The recorder alone is too weak.
03 / Reveal the solution · spoilers
Complete the badge and emitter branches in either order. Use the assembled emitter on the relay cabinet, then recover portable parts once the interior release has latched.
08Administrative QuarterLocation
01 / A gentle nudge
Look for a communications specialist in the transfer records.
02 / Reveal a clearer clue
A utility designation identifies the correct detention intake.
03 / Reveal the solution · spoilers
Ask the clerk through Sela about communications transfers, or select detention communications 7 on the conduit labels. Records and Drakel can be solved in either order.
09Undercity ConduitLocation
01 / A gentle nudge
The blind animal responds to water pressure.
02 / Reveal a clearer clue
Redirect the surge into the western water-only bypass. The northern return stairs remain safe.
03 / Reveal the solution · spoilers
Close central flow; open western bypass; set high pressure HALF; release central gate. Then choose detention communications 7 on the intake labels.
10Detention Annex SevenLocation
01 / A gentle nudge
Opening Reed’s field needs a system response. Escaping needs his expertise.
02 / Reveal a clearer clue
Environmental controls are north. After rescue, Reed can interpret the terminal timing with your recorder and translator.
03 / Reveal the solution · spoilers
Stage all three samples at Control and confirm evacuation. Ask Reed to analyze timing at the terminal, select Sector Four and paired pulse timing, then transmit. Use the east escape.
11Detention Control NodeLocation
01 / A gentle nudge
One false sensor reading is insufficient.
02 / Reveal a clearer clue
Heat, particles and a combustion marker must agree inside the test housings. Gather supplies before committing.
03 / Reveal the solution · spoilers
Use coil on heat probe with the recovered city cell; dust pouch on particle intake; Narik’s solvent on chemical grille. Review and trigger evacuation. Recovered recorder/translator must be packed for Reed.
12Old BathhouseLocation
01 / A gentle nudge
Listen to Reed before choosing the next rescue.
02 / Reveal a clearer clue
His account and Veyr’s public address explain the northern route. The badge can be returned through a protected hatch.
03 / Reveal the solution · spoilers
Talk to Reed through five saved pages. Optionally visit Narik via south and return the badge. Take the north stair and confirm departure for the observatory.
Chapter 6 / Field journal
The House of Dead Stars
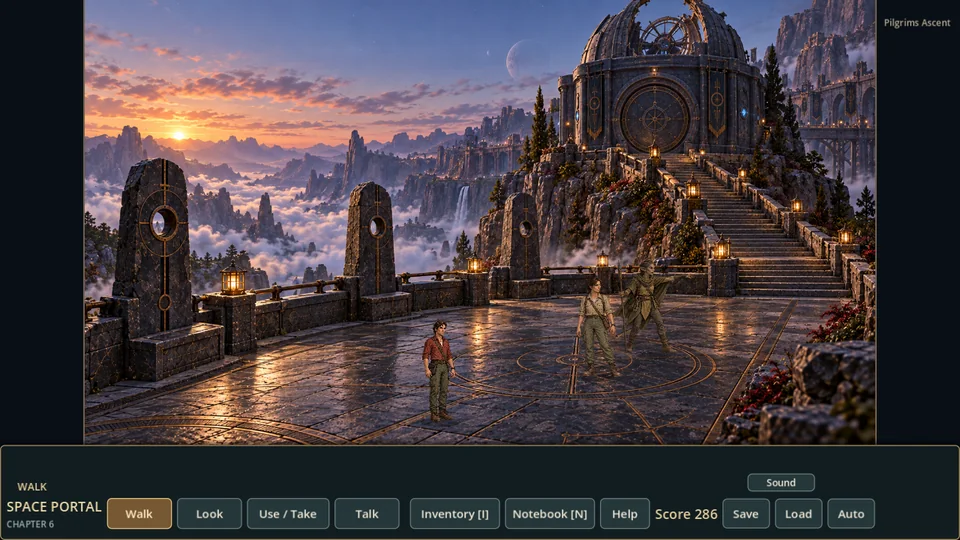
Chapter route advice · spoilers
Gravity and lens alignment can be solved in either order. Copy the records and review withdrawal before leaving the public halls.
01Lower SanctuaryLocation
01 / A gentle nudge
Someone should watch over Ortega.
02 / Reveal a clearer clue
Speak with Reed about his receiver and Sela about her field kit.
03 / Reveal the solution · spoilers
Talk to Reed and accept preparations before climbing north. After escape, hear all reunion pages and take the south road.
02Pilgrim's AscentIllustrated field note
01 / A gentle nudge
The stones frame different lights in the actual sky.
02 / Reveal a clearer clue
Sight each aperture and compare its etched directions.
03 / Reveal the solution · spoilers
Use all three stones. Large moon: NW; small moon: SE; bright planet: NE. Notes preserve your observations.
03Celestial GateLocation
01 / A gentle nudge
The rings repeat the sighting-stone symbols.
02 / Reveal a clearer clue
Match each celestial object to its observed direction.
03 / Reveal the solution · spoilers
Set large moon NW, small moon SE, bright planet NE; test the optical channels. Wrong trials reset harmlessly.
04Grand OrreryIllustrated field note
01 / A gentle nudge
This is a network, with two accessible wings.
02 / Reveal a clearer clue
The gravity wing reaches an upper gallery. The lower lens floor has its own entrance.
03 / Reveal the solution · spoilers
Solve gravity and Earth alignment in either order. After records are copied, examine the network account and review withdrawal at the promenade console.
05Gravity GalleryLocation
01 / A gentle nudge
The weight is part of an electrical and mechanical circuit.
02 / Reveal a clearer clue
Each field changes which guided cradle can receive the weight.
03 / Reveal the solution · spoilers
Select LEFT, move weight to left cradle; select CEILING and latch upper cradle; select RIGHT and release return ladder. During lockdown select third track, then feed the weight into it.
06Control BalconyLocation
01 / A gentle nudge
A damaged tooth is not the only interesting detail.
02 / Reveal a clearer clue
The upper archive approach continues east; the separate Crown service door opens during lockdown.
03 / Reveal the solution · spoilers
Go east to Upper Lens Gallery. An optional stair latch there gives access to lower lenses. Return west down the ordinary gravity ladder when needed.
07Lens HallIllustrated field note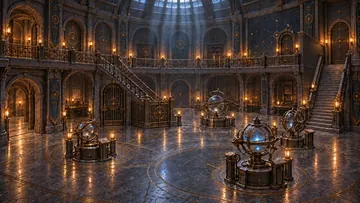
01 / A gentle nudge
The notebook shows a familiar sky, not this planet’s sky.
02 / Reveal a clearer clue
Four coupled lenses shift several marks at once. Use Eleanor’s notebook on the lenses to compare patterns.
03 / Reveal the solution · spoilers
Turn lenses A once, B twice, C once, D three times from their initial positions; verify seven marks around Polaris. During lockdown release one lens after copying the record.
08Upper Lens GalleryUpper walk zone
01 / A gentle nudge
The archive needs physical access and the right optical pattern.
02 / Reveal a clearer clue
The stair latch can only be released here, and is optional.
03 / Reveal the solution · spoilers
Use the latch to open the central stair if desired. Earth alignment from below and restored gravity access allow the eastern archive door.
09Restricted ArchiveLocation
01 / A gentle nudge
The preservation system protects a local compartment.
02 / Reveal a clearer clue
Listen first. Direct only that bay’s vent; dust, moisture and a contact intrusion must agree.
03 / Reveal the solution · spoilers
Use toolkit on shutter; pull dust release; use Sela’s water tube on intake; take and use probe on touch sensor. Review guard-only boundary, trigger preservation, then talk to Eleanor.
10Archive of WaysLocation
01 / A gentle nudge
Words, grammar and context come from different sources.
02 / Reveal a clearer clue
Eleanor needs the translator and the Talar wafer before reconstructing damaged history.
03 / Reveal the solution · spoilers
Use translator on records and data wafer on socket. Order: roads opened, keepers assigned, breach detected, sever network, keys separated, guard sleeping gates. Read all pages and preserve copies.
11Telescope CrownLocation
01 / A gentle nudge
The telescope has two independent interlocks.
02 / Reveal a clearer clue
The protected service routes lead to lenses and the gravity weight. Eleanor can read the western coordinates.
03 / Reveal the solution · spoilers
Release a lens and shift weight into the telescope track in either order. Ask Eleanor for WEST / TWO, select it on controls, rotate, use fiber then sling on anchor, tension-test and traverse.
12Orrery · after reading the recordsOrrery interpretation
01 / A gentle nudge
This is a network, with two accessible wings.
02 / Reveal a clearer clue
The gravity wing reaches an upper gallery. The lower lens floor has its own entrance.
03 / Reveal the solution · spoilers
Solve gravity and Earth alignment in either order. After records are copied, examine the network account and review withdrawal at the promenade console.
Chapter 7 / Field journal
The Machine That Should Not Work
Chapter route advice · spoilers
Record the reference before leaving the Observation Gallery. Reference construction and reserve preparation can then proceed in either order. Review the prepared handoff before beginning the rescue.
01Volcanic BasinIllustrated field note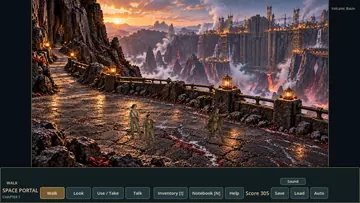
01 / A gentle nudge
Study the copied map with your companions.
02 / Reveal a clearer clue
The distant public gate is watched. Sela knows an older approach.
03 / Reveal the solution · spoilers
Use the route map, finish the team briefing, and take the north fissure.
02Custodian GateLocation
01 / A gentle nudge
The door asks three different questions.
02 / Reveal a clearer clue
Eleanor can identify the destination; Reed has retained the badge timing. The translator reacts to that pulse.
03 / Reveal the solution · spoilers
Ask Eleanor, set NEXUS, use translator on recesses, use recorder and test raw pulse, then route it THROUGH TRANSLATOR and test. Nothing is consumed.
03Service SpineLocation
01 / A gentle nudge
The newer work tells a different story from the old architecture.
02 / Reveal a clearer clue
Look for the workers’ opening beside the collapse.
03 / Reveal the solution · spoilers
Take the east opening; the central rubble is impassable.
04Robotics BayLocation
01 / A gentle nudge
The custodian follows priorities.
02 / Reveal a clearer clue
A protected machine needing sanitation outranks an unauthorized visitor. Its two power sources are distinct.
03 / Reveal the solution · spoilers
Take markers. Use white and blue on conduit; ask Eleanor for its protected-system glyph, then assign task. After diagnosis, verify mobility cell and detach the separate reservoir at charger.
05Flooded LaboratoryIllustrated field note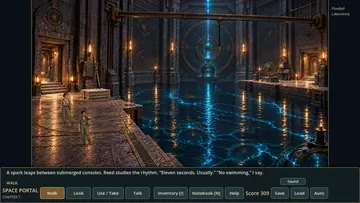
01 / A gentle nudge
Nonconductive material still needs stability and guidance.
02 / Reveal a clearer clue
The panel straps are local supplies. The hanging cable has a captive rail coupling.
03 / Reveal the solution · spoilers
Bind three panels. Take/use insulated pole on rail; Reed holds a safe interval. At dock engage captive coupling and load-test. Board for an explicit crossing. Return from far dock the same way.
06Power Distribution RingLocation
01 / A gentle nudge
Three grid sectors can run continuously.
02 / Reveal a clearer clue
Research, Wayfinder and Cooling are the safe preparation combination. Reserve preparation must not drain it.
03 / Reveal the solution · spoilers
Switch Security off and Wayfinder on; apply. Optional latch opens shortcut. After diagnosis, recover charger reservoir and use it on isolated cradle. Leave its discharge isolated.
07Observation GalleryIllustrated field note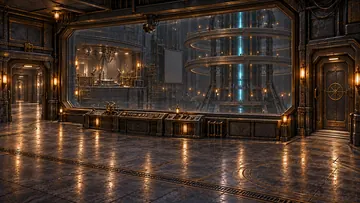
01 / A gentle nudge
A safe recording is more useful than rushing through the glass.
02 / Reveal a clearer clue
Use the recorder feed to preserve Mercer’s changing trace.
03 / Reveal the solution · spoilers
Use recorder on observation console, then inspect the window and read the encounter. Retreat east after Veyr detects you; the Gallery closes.
08Research Access LevelLocation
01 / A gentle nudge
Mercer is part of a calibration reference, not its power source.
02 / Reveal a clearer clue
The recorded trace needs diagnosis. Two preparation jobs can proceed independently.
03 / Reveal the solution · spoilers
Use diagnostic after discovery. Build reference at Calibration and connect isolated reservoir at Ring in either order. Release fail-safe lever and stage device/team before starting handoff.
09Calibration LabLocation
01 / A gentle nudge
A perfect repeat is too perfect.
02 / Reveal a clearer clue
The gel’s resistance changes with heat. Reed needs a matching generator and a variable harness trace.
03 / Reveal the solution · spoilers
After diagnosis, collect coupling lock; connect oscillator, recorded feedback and gel/coil. Choose IRREGULAR heater, test live reference and pack it. Both reserve/reference orders work.
10Interface ChamberUpper walk zone
01 / A gentle nudge
Prepare every connection before committing.
02 / Reveal a clearer clue
Eleanor watches the status glyph; Reed corrects resonance. Stop when warned.
03 / Reveal the solution · spoilers
Use variable reference on interface. Stage team and fail-safe; start prepared handoff. Feed recording, add variable circuit, read glyph, release first and second sensors, ease third, STOP and retune, then remove harness. Unsafe order restores prepared checkpoint.
11Wayfinder ChamberLocation
01 / A gentle nudge
Give the query a valid answer without contacting another world.
02 / Reveal a clearer clue
Each specialist can prepare one part; a locked physical routing change isolates the output.
03 / Reveal the solution · spoilers
Ask Eleanor for closed calibration address, Mercer for +1 phase / 3-beat delay, Reed to prepare reply. Use toolkit on couplings, then mechanical lock. Set INTERNAL address, +1 phase, 3 beats; send reply.
12Containment WalkwayLocation
01 / A gentle nudge
The robot still has its own charged locomotion cell.
02 / Reveal a clearer clue
A hazard marker can give it the stuck sensor as a priority.
03 / Reveal the solution · spoilers
Use red marker on failed sensor. The custodian holds it while both pressure doors synchronize. Leave south; it stays inside.
13Steam FieldsLocation
01 / A gentle nudge
Everyone needs the same account before the next journey.
02 / Reveal a clearer clue
Sela can guide the party back to Ortega’s camp.
03 / Reveal the solution · spoilers
Talk to Sela or use camp route, read all reunion pages, then leave east and commit to the fortress approach.
Chapter 8 / Field journal
The Regent’s Fortress
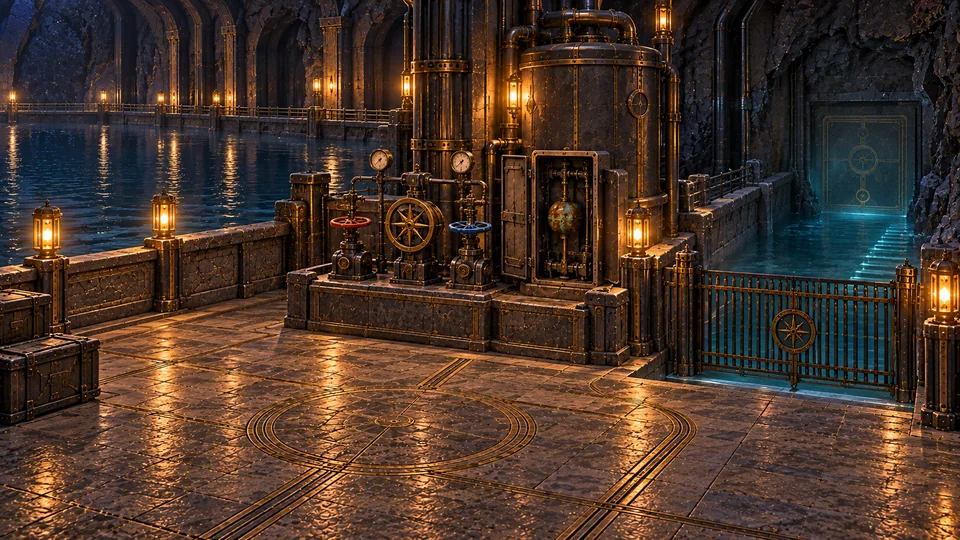
Chapter route advice · spoilers
False orders and overlook reconnaissance can be prepared in either order. Rescue Briggs before Delaney, and recall the whole expedition to the private floor before recovering the Key. Lockdown closes the service routes; the freight bridge is a one-way escape.
01Western ReservoirIllustrated field note
01 / A gentle nudge
Only the isolated bay needs to lose water.
02 / Reveal a clearer clue
Mercer can observe a quiet pump phase. Reed can hold status while the float is repaired. Eleanor knows which gate serves the bay.
03 / Reveal the solution · spoilers
Take local stock. At controls observe pump and hold status. Use toolkit then waterworks bar on float. Ask Eleanor. Select SERVICE VOID and balance/open; main reservoir stays full.
02Foundation ChannelLocation
01 / A gentle nudge
The soldiers overhead expect a rescue.
02 / Reveal a clearer clue
Their words confirm the prisoners are bait, but the foundation route is still clear.
03 / Reveal the solution · spoilers
Follow the dry eastern promenade to the lift. The watercourse is not a shortcut.
03Underkeep LiftLocation
01 / A gentle nudge
The lift has power; the lock is procedural.
02 / Reveal a clearer clue
Inspection transport is separate from ordinary travel. The landing sensor has a narrow service slot.
03 / Reveal the solution · spoilers
Use the fresh sensor strip from the reservoir locker on landing sensor, then request shaft inspection. Take the lift upward.
04Service QuarterLocation
01 / A gentle nudge
There are two independent ways to prepare detention access.
02 / Reveal a clearer clue
The relay reaches Reed; the upper passage reaches Delaney’s overlook. Study the old sign and service stock.
03 / Reveal the solution · spoilers
Take service supplies/communicator and read inscription. Visit relay for false orders and overlook for reconnaissance, in either order. Orders open prisoner access; Briggs and reconnaissance are both needed for Delaney.
05Communications RelayLocation
01 / A gentle nudge
A real procedure makes the best false order.
02 / Reveal a clearer clue
The old phrase and its modern descendant differ by a syllable. Record Sela through the local communicator.
03 / Reveal the solution · spoilers
Read old sign at Service Quarter; take communicator there. Use retained recorder on relay, intercept shift code, choose OLD / MODERN AMBIGUOUS, record Sela, transmit. Exact modern and emergency versions are rejected safely.
06Suspended Detention ShaftIllustrated field note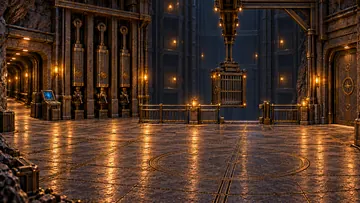
01 / A gentle nudge
Briggs has watched the carriage for days.
02 / Reveal a clearer clue
His sticky center weight needs a little more mass after the other loads are secured. The last gap needs a manual draw.
03 / Reveal the solution · spoilers
Talk to cell. Use pin on weights, release center, let right take load, use fluid can on weights, test. Use hook and fresh towing line on cleat. Ask Sela to brace, draw cell, open mechanical latch. All four local supplies stay installed.
07Outer Ring OverlookUpper walk zone
01 / A gentle nudge
The vault has a special evacuation exception.
02 / Reveal a clearer clue
Read the four structural reports; power or fire alone will not open it.
03 / Reveal the solution · spoilers
Use gauges: read evacuation exception, map four reports with Reed, record reconnaissance. Lower access still needs false orders. Delaney rescue additionally needs Briggs.
08Interrogation RingLocation
01 / A gentle nudge
A load change can be real without damaging a support.
02 / Reveal a clearer clue
Briggs must map the loads; Reed must hold a common frame across all four reports.
03 / Reveal the solution · spoilers
After Briggs rescue and recon, use toolkit on service controls. Ask Briggs to map, hold reports, move first and second carts east, release opposite counterweight, restore reports. Speak to Delaney and finish all account pages.
09Regent's ArchiveLocation
01 / A gentle nudge
Veyr’s engineering reports are also a local site index.
02 / Reveal a clearer clue
Read the decline records and copy the local gate designation. Recall the remote team while routes are open.
03 / Reveal the solution · spoilers
Finish both report pages and copy ARRIVAL VALLEY. Use rendezvous to recall Reed, Mercer and Ortega. Reed leaves a dormant overload relay and brings the local trigger; all eight must be here before Key recovery.
10Star VaultLocation
01 / A gentle nudge
Know the road. Silence the road. Release the road.
02 / Reveal a clearer clue
The local gate is not Earth. Disconnecting a modern cable does not cancel the Ancient carrier. The quarantine selector has four boundaries.
03 / Reveal the solution · spoilers
Key: select ARRIVAL VALLEY, isolate modern monitor, set vanes 1 / 2 / 3, compare, take/use service bar on cradle, turn twice, recover after team rendezvous. Confrontation: exposure then boundary; use bar and Key on selector; choose ring 2; stage Delaney/Briggs; save/start, trigger dropout, redirect bus, seal. No hidden timer.
11Fortress Escape / Freight BridgeIllustrated field note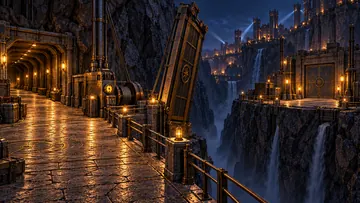
01 / A gentle nudge
The bridge has its own counterweight and cable.
02 / Reveal a clearer clue
Briggs needs an open brake and a safety lashing. Mercer can isolate the motor.
03 / Reveal the solution · spoilers
Take freight stock: one brake lashing plus three onward portions. Use toolkit then lashing on brake. Rerig cable, isolate motor, release brake. Send four pairs across; no walking over a retracted span.
12City BelowLocation
01 / A gentle nudge
Count everybody before sealing the pursuit route.
02 / Reveal a clearer clue
The chapter’s ally rewards follow earlier choices; the eastern road does not require them.
03 / Reveal the solution · spoilers
Use bulkhead lever, confirm all eight, close it. Optionally contact Sela’s allies for eligible help. Leave east; no mandatory item comes only from an ally.
13Eastern RidgeLocation
01 / A gentle nudge
Everyone is free. Home still needs a working route.
02 / Reveal a clearer clue
The Key fragment and Eleanor’s copied sky remain separate pieces of the answer.
03 / Reveal the solution · spoilers
Finish the three reunion pages, prepare road home, take the east path and explicitly leave for portal valley. The ending saves; choose Continue to Chapter 9 to carry the expedition onward.
Chapter 9 / Field journal
The First Gate

Chapter route advice · spoilers
Generator preparation and cradle preparation are independent; complete both before the shared bypass. Power repair and stand assembly can then proceed in either order. Verify all three route references before committing to the surface. The final crossings and epilogue are story transitions, not return paths.
01Portal Valley OverlookIllustrated field note
01 / A gentle nudge
The scanners need only recognize a carrier, not a destination.
02 / Reveal a clearer clue
Reed can sample with the recorder. Mercer can tune fresh local parts; Sela knows three independent deployment routes.
03 / Reveal the solution · spoilers
Use the recorder on Reed’s station, sample, choose intermittent carrier and assemble three. Deploy sled, breakaway harness and floating pod from Routes; activate all three.
02Old Relay PathLocation
01 / A gentle nudge
The old repair still works. The new obstruction is structural.
02 / Reveal a clearer clue
Read the custodian display and ask Briggs which loose stone carries no load.
03 / Reveal the solution · spoilers
Use relay, read custodian access; stones: loose cap, left wedge, right chock. Never remove the loaded arch.
03Beneath the First GateIllustrated field note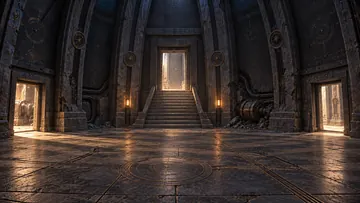
01 / A gentle nudge
Two teams can prepare independently.
02 / Reveal a clearer clue
Energy work is west; mechanical stand work is east. Both must be ready before bypass.
03 / Reveal the solution · spoilers
Prepare the generator’s outer-barrier circuit, telemetry, dummy load and suspension. Prepare cradle tubes, screws, fresh fiber and retrieval. Return to generator to begin staged bypass.
04Field Generator PitLocation
01 / A gentle nudge
Separate preparation, parts retrieval and powered repair.
02 / Reveal a clearer clue
The generator supplies a core and collar; the sensor must be unloaded before adjustment.
03 / Reveal the solution · spoilers
Trace OUTER BARRIER, record telemetry, wind local dummy load, build suspension. After cradle prep: stage bypass, loop, engage load, extract, lower stand, isolate feed. Fit core; patch conduit; jack, align index to 2, lower load.
05Key CradleIllustrated field note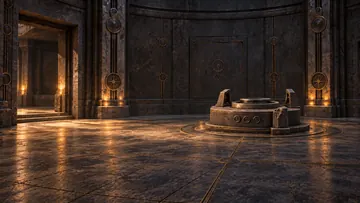
01 / A gentle nudge
Assembly can precede power. Recognition cannot.
02 / Reveal a clearer clue
A new antenna stand needs extensions, a padded collar and preserved screw adjusters.
03 / Reveal the solution · spoilers
Take recess fiber. Measure tubes, preserve screws, stage retrieval. After bypass extend legs; use housing clamp to line it; fit padded collar. With stable power insert Key. Turn A once, B twice, C once; compare.
06Route ChamberLocation
01 / A gentle nudge
Three references must agree before choosing a safe mode.
02 / Reveal a clearer clue
The scar has symmetry; the sky needs a viewpoint reversal; the watch resolves a phase ambiguity in the existing gate reference.
03 / Reveal the solution · spoilers
Origin: inward. Sky: 180-degree viewpoint turn (not mirror). Compare watch: B, controls 2/1/0. Verify each, then explicitly commit VERIFIED PAIR ONLY / NETWORK SILENT and review departure.
07Portal ClearingLocation
01 / A gentle nudge
Stop the imposed handshake while preserving the known pair.
02 / Reveal a clearer clue
Reed needs equal inverted carrier; Mercer needs the middle amplitude. Restore follows refusal, not the reverse.
03 / Reveal the solution · spoilers
Talk through Veyr confrontation. Prepare crisis checkpoint. Invert carrier; set amplitude 2; commands UNVERIFIED SOURCE, REFUSE HANDSHAKE, RESTORE VERIFIED PAIR. Release both supports, send Sela. Disconnect, rotate, brace with service bar, reconnect first then second. After stand-down open Earth, send six in order, return pass, remove Key and cross last.
08Home / Wasatch ChamberLocation
01 / A gentle nudge
Everybody made it.
02 / Reveal a clearer clue
There is time to look around before the debrief.
03 / Reveal the solution · spoilers
Speak to the expedition. The west door advances several hours to the debrief.
09Debrief RoomLocation
01 / A gentle nudge
You can talk to everyone before ending the game.
02 / Reveal a clearer clue
The briefing settles what happens to the Key.
03 / Reveal the solution · spoilers
Complete the two briefing pages. Conversations are optional; Finish the debrief commits Key transfer and begins the midnight epilogue.
10After MidnightEpilogue
01 / A gentle nudge
The gate is dormant.
02 / Reveal a clearer clue
Watch the instruments.
03 / Reveal the solution · spoilers
Continue the final illustrated sequence to the end title.
From the development game and its approved route atlas. Explore the scenes, then open only the hints you need. Prefer to discover it yourself? Try a spoiler-free website puzzle →